
Stained Glass Candy, also known as Sugar Glass or Rock Candy, is delicious and eye-catching. The broken pieces look like shards of stained glass—so pretty!
Stained glass candy can be made in nearly any flavor and color you can think of, but I love cinnamon rock candy with its fiery red color the most!
Plus, it’s surprisingly easy to make. It requires a candy thermometer, attention, and patience, but I swear it’s not difficult. You just have to promise not to leave the kitchen when it’s on the stove.

Why We Love this Hard Candy Recipe
- The nostalgia of old-fashioned candy glass can’t be beat.
- Perfect for gift-giving.
- It lasts a long time.
- Versatile – can be made in oodles of different flavors.
- Pretty and festive.
Key Ingredients and Kitchen Tools

- Granulated sugar: It is the primary ingredient in the rock candy, providing sweetness and structure to the final product. When heated to high temperatures, it melts and then solidifies to create the hard candy texture.
- Light corn syrup: Corn syrup is used to prevent crystallization of sugar. It helps create a smooth texture in the candy by interfering with sugar crystal formation, resulting in a smoother, more consistent finished product.
- Water: Water is used to dissolve the sugar and corn syrup. It helps create a syrup that is heated to the desired temperature for making sugar glass.
- Gourmet candy flavoring: These flavorings add taste and aroma to the candy. They come in various flavors like peppermint, strawberry, lemon, etc., enhancing the overall appeal of the sugar glass.
- Food coloring: Food coloring is added for aesthetic purposes, giving the candy vibrant colors. It makes the candy visually appealing and can be paired with specific flavors to create a more enjoyable experience.
- Powdered sugar: Powdered sugar is used for dusting the surface where the candy will be poured and cooled. It prevents the candy from sticking to the surface, making it easier to handle and break into pieces after hardening.
- Candy thermometer: The candy thermometer is used in this hard Christmas candy recipe to monitor the temperature of the sugar syrup precisely, ensuring it reaches the hard crack stage (around 300°F/150°C) necessary for the candy to set properly and achieve the desired texture.
How to Make Sugar Glass Stained Glass Candy
Step 1: Line a jelly roll pan with aluminum foil, and sprinkle with a layer of powdered sugar. Set aside.

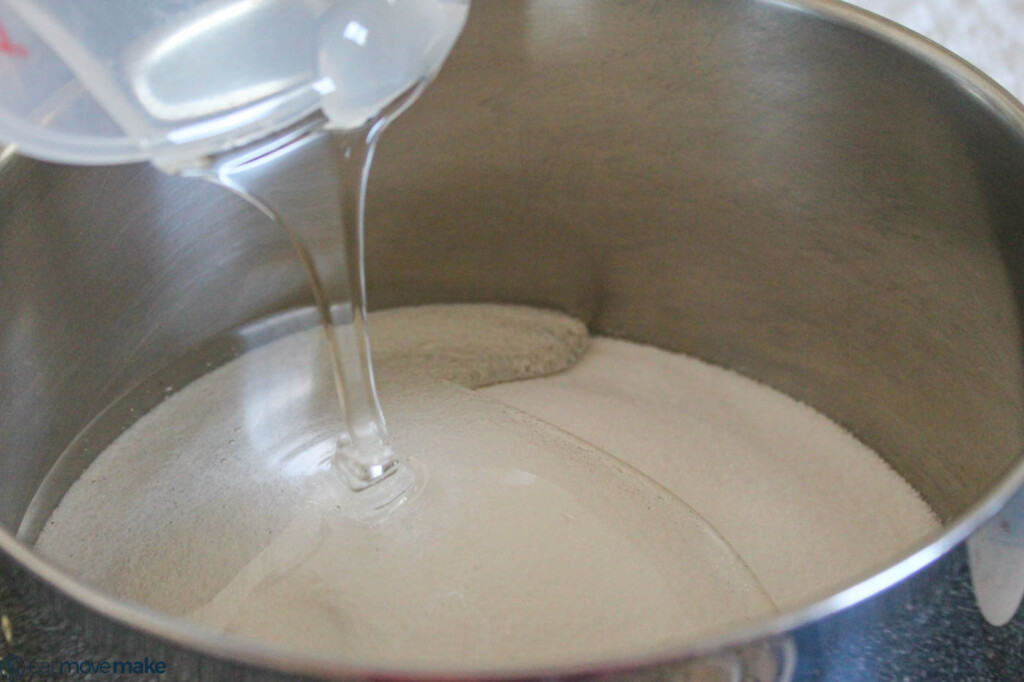
Step 2: Combine the white sugar, corn syrup, and water in a large saucepan, and stir continuously over medium heat until the sugar dissolves and the mixture begins to boil.

Step 3: Continue boiling without stirring. When the candy thermometer reaches approximately 260 degrees F, drop in flavoring and then drops of food coloring until the mixture reaches your desired color. Continue boiling without stirring until the temperature reaches 300 degrees F. Remove from heat.
Note: I used about 9-10 drops of red food coloring to make my cinnamon rock candy. If the boiling action doesn’t mix in the color, you can use a toothpick to gently move it around and mix it in.)

Step 4: Pour candy into the prepared pan. Let the candy cool and harden. Crack into pieces and store in an airtight container.


Helpful Tips
- Use a Candy Thermometer: Ensure accuracy in reaching the desired temperature stages. The candy thermometer helps achieve the precise temperatures required for the candy to set correctly. We love this candy thermometer.
- Preparation is Key: Have all your ingredients measured and ready before starting. You’ll need to work quickly once the sugar syrup reaches the desired temperature.
- Be Cautious with Hot Sugar: Sugar syrup reaches very high temperatures and can cause severe burns. Handle it with extreme care and keep children away from the cooking area.
- Avoid Over-Stirring: Once the sugar dissolves, minimize stirring to prevent crystallization.
- Adjust Flavoring and Coloring: Experiment with different flavors and colors for unique combinations. Start with a small amount of food coloring and adjust to achieve the desired appearance.
- Prepare the Workspace: Line the baking sheet with aluminum foil and dust it lightly with powdered sugar before pouring the hot candy mixture. This will prevent sticking and ease removal once cooled.
- Allow Sufficient Cooling Time: Let the candy cool completely at room temperature before breaking it into pieces. Rushing this step might result in sticky or unevenly set candy.
- Clean Up Afterwards: Hot sugar can harden quickly. To clean utensils or pans, soak them in hot water to dissolve the sugar before washing.
- Storage: Store the candy in an airtight container at room temperature. Layer it between sheets of parchment or wax paper to prevent sticking.
Stained Glass Candy Color and Flavor Ideas
Note: We recommend LorAnn candy flavorings.
- Red: Use red food coloring for flavors like cinnamon, cherry, watermelon or strawberry.
- Green: Match green coloring with spearmint, lime or green apple flavorings.
- Yellow: Pair yellow color with lemon or pineapple flavors.
- Blue: Blue color can complement flavors like blue raspberry or cotton candy.
- Purple: Purple coloring works well with grape or mixed berry flavors.
- Orange: Use orange coloring for orange-flavored candy.
- White: Keep the candy glass natural-colored for peppermint.

More Recipes to Try!

Stained Glass Candy – Rock Candy Recipe
Ingredients
- Powdered sugar used for lining the foil
- 2 cups granulated sugar
- ¾ cup light corn syrup
- ½ cup water
- 1½ teaspoons gourmet flavoring of your choice
- food coloring that goes with your flavor choice
Instructions
- Line a jelly roll pan with aluminum foil, and sprinkle with a layer of powdered sugar.
- Combine the white sugar, corn syrup, and water in a large saucepan, and stir continuously over medium heat until the sugar dissolves and the mixture begins to boil.
- Continue boiling without stirring. When the candy thermometer reaches approximately 260 degrees F, drop in flavoring and then drops of food coloring until the mixture reaches your desired color. Continue boiling without stirring until the temperature reaches 300 degrees F. Remove from heat.Note: I used about 9-10 drops of red food coloring to make my cinnamon rock candy. If the boiling action doesn’t mix in the color, you can use a toothpick to gently move it around and mix it in.)
- Pour candy into the prepared pan. Let the candy cool and harden. Use the side of a meat tenderizing mallet to crack into pieces and store in an airtight container.
Notes
- Use a Candy Thermometer: Ensure accuracy in reaching the desired temperature stages. The candy thermometer helps achieve the precise temperatures required for the candy to set correctly. We love this candy thermometer.
- Preparation is Key: Have all your ingredients measured and ready before starting. You’ll need to work quickly once the sugar syrup reaches the desired temperature.
- Be Cautious with Hot Sugar: Sugar syrup reaches very high temperatures and can cause severe burns. Handle it with extreme care and keep children away from the cooking area.
- Avoid Over-Stirring: Once the sugar dissolves, minimize stirring to prevent crystallization.
- Adjust Flavoring and Coloring: Experiment with different flavors and colors for unique combinations. Start with a small amount of food coloring and adjust to achieve the desired appearance.
- Prepare the Workspace: Line the baking sheet with aluminum foil and dust it lightly with powdered sugar before pouring the hot candy mixture. This will prevent sticking and ease removal once cooled.
- Allow Sufficient Cooling Time: Let the candy cool completely at room temperature before breaking it into pieces. Rushing this step might result in sticky or unevenly set candy.
- Clean Up Afterwards: Hot sugar can harden quickly. To clean utensils or pans, soak them in hot water to dissolve the sugar before washing.
- Storage: Store the candy in an airtight container at room temperature. Layer it between sheets of parchment or wax paper to prevent sticking.

